
Adding shipping zones in WooCommerce
Go to WooCommerce → Settings → Shipping

Here you’ll see the list of existing shipping zones — you can edit them or add new ones.
To add a new one, create a zone by giving it a clear name and then add the “Zone Regions” from the list.
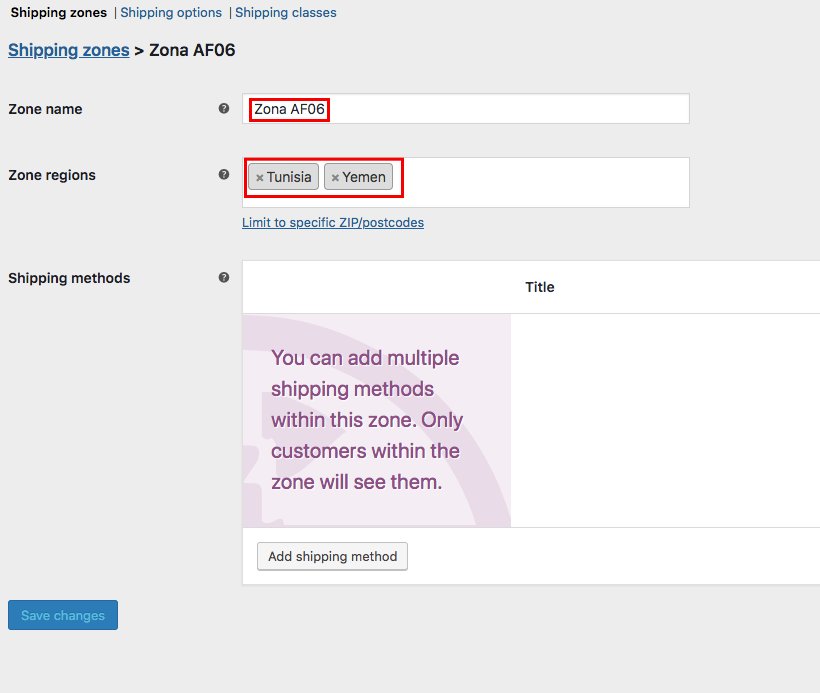
The zone name can be descriptive, and it’s best if it matches the pricing table provided by your logistics company. For example: Zone AF09 → where AF refers to the continent and 09 to the specific area.
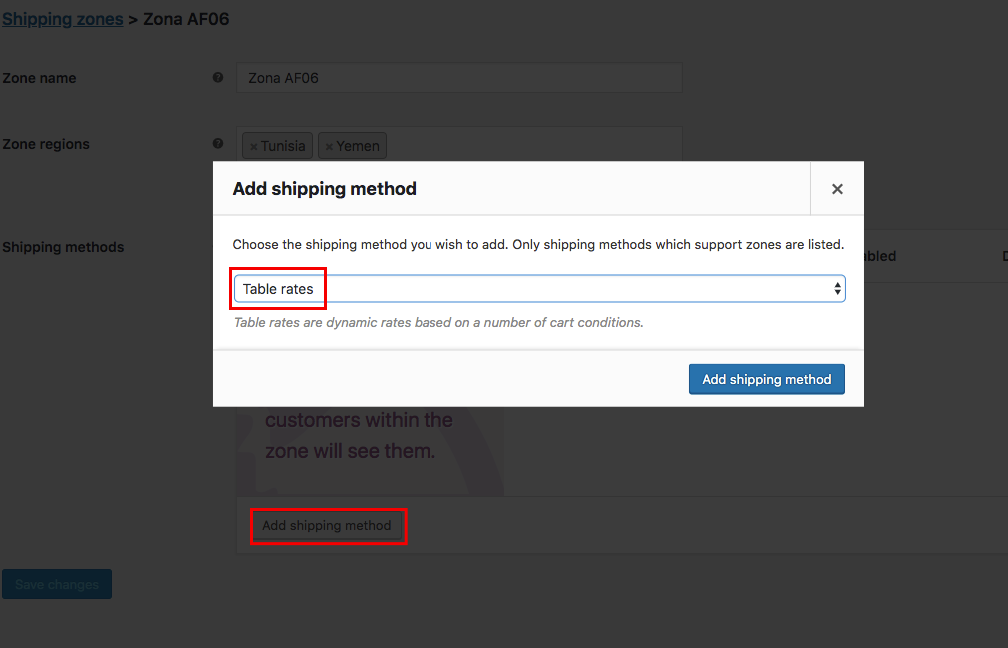
Next, to add the table of values, click “Add shipping method” and choose “Table Rates.”
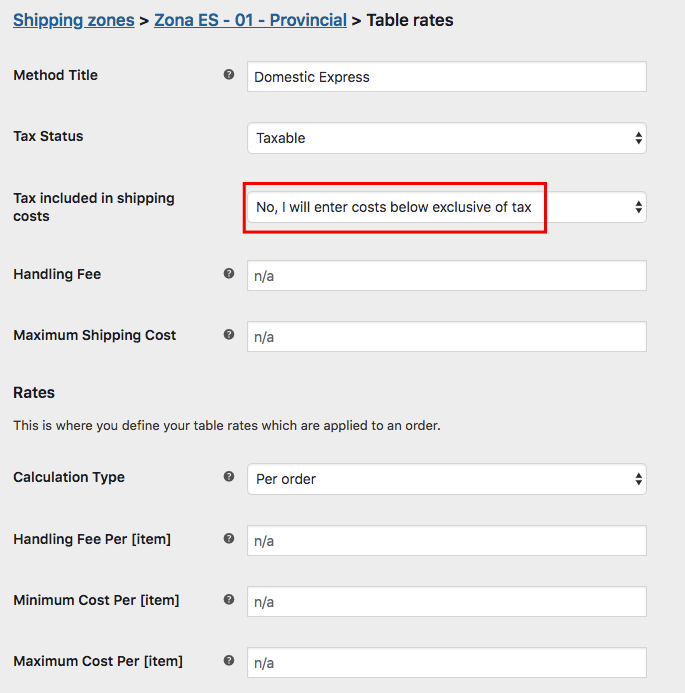
It’s important to enable “tax included in shipping costs” since taxes don’t depend on the destination country, but on the shipping company’s location — in this case, Spain.
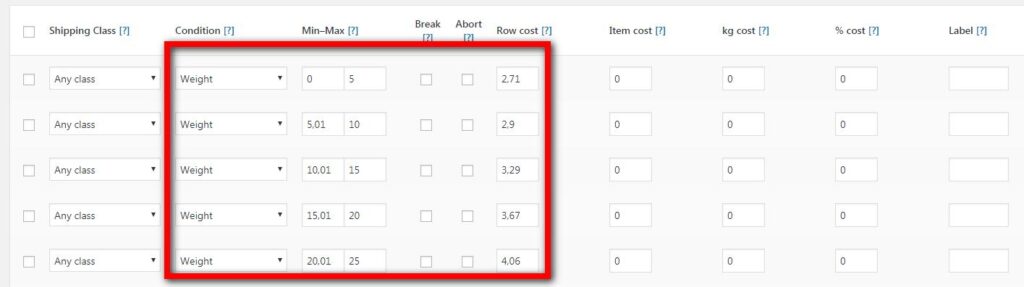
In the shipping table, you can set different conditions that increase the cost — usually, this is based on weight. If that’s the case, select the “Weight” condition. “Min–Max” defines the weight range (for example: if one range goes from 0–5, the next should go from 5.01–10, etc.), and “Row Cost” sets the price for that weight range.
I think that’s everything. I’ve attached the Excel file below.
#WooCommerce